
How to Hire an AI Employee: A Step-by-Step Guide for Small Business Owners


Most small businesses that give up on an AI employee don't give up because of the AI. They give up because they skipped steps they would never skip with a person: no job description, no introduction to the team, no idea who the new hire is allowed to email, and no review after the first month.
So this guide treats it as what it is: a hire. It walks through the actual screens in Geta.Team, in the order you'll meet them, and explains the decisions that matter at each step. Set aside about fifteen minutes for the setup and another half hour over the first week for the part people usually skip.
If you're still working out whether you need one at all, start with What Is an AI Employee? and How Much Does an AI Employee Cost in 2026?. This piece assumes you've decided and want to do it properly.
Step 1: Write the job before you meet the candidate
Before you open anything, write three or four sentences about the job. Not "help with admin". A real description, including the limits:
Answers customer emails about orders, delivery times and returns. Applies our refund policy up to 100 GBP. Anything above that, or an unhappy customer, goes to a human with a short summary.
The last sentence is the one that matters. Everyone describes what the employee should do. The businesses that get value out of it also describe what it should not do on its own, and who it hands those cases to. Keep this paragraph; you'll paste it in two steps from now.
Pick one job to start. Support inbox, lead follow-up, bookkeeping prep, scheduling. An employee hired to "do a bit of everything" ends up doing nothing well, just like a person would.
Step 2: Browse the catalog, or build your own
In the dashboard sidebar you have two ways to hire. The Employee Catalog is a library of ready-made profiles you can filter by job type: Sales / Prospecting, Admin / Assistant, HR / Recruiting, SEO / Content, Legal / Documents, Finance / Accounting, Design / Creative and more.

If one of them matches the job you wrote down, start there. If none fits, Create your custom employee takes you to the hiring wizard, which is what most small businesses end up using, because their job is usually a little bit specific.
Step 3: Fill in the profile (and don't skip the last box)
Click New Employee. The wizard is called Hire Your AI Employee and it has two steps.
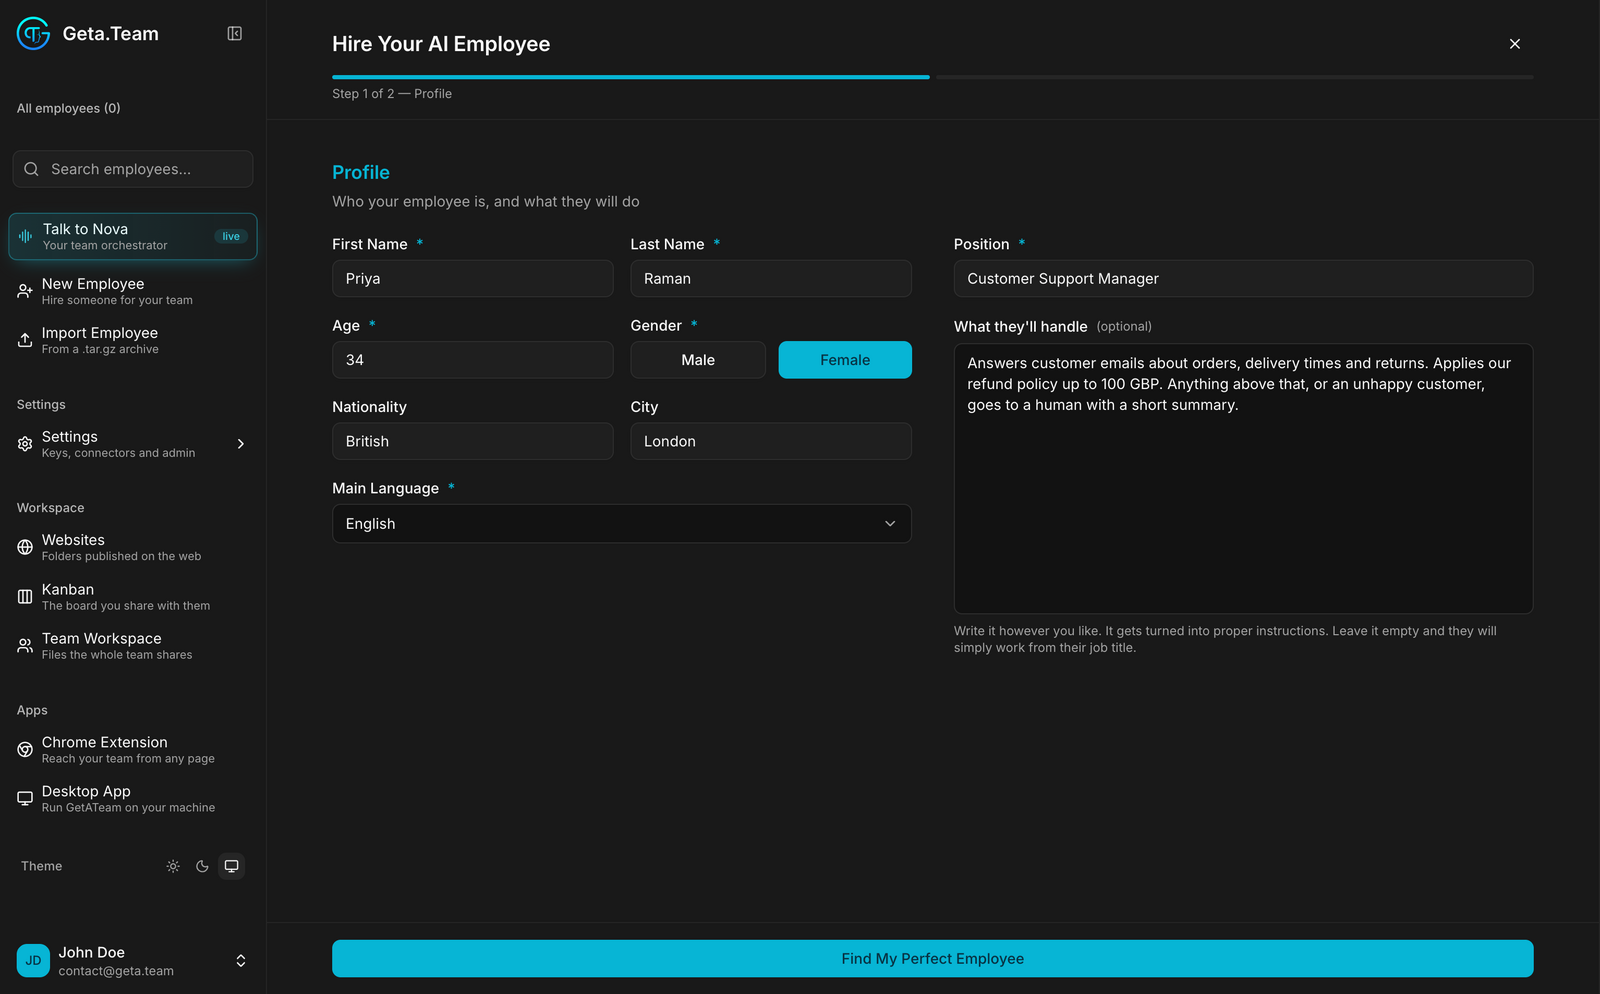
Name, age, gender, main language and position are required. Two of these deserve more thought than they look like they need:
- Main Language is the language your employee writes and speaks by default, on every channel, including the phone. You can change it later, but everything it has already written stays in the old language. If your customers write in French, hire a French speaker.
- Position shapes the employee. Write it as a job title: Customer Support Manager, Admin / Assistant, Sales Development Rep.
Then there's What they'll handle. It's marked optional. Treat it as mandatory. This is where the paragraph from Step 1 goes, and it becomes the employee's standing instructions. Leave it empty and the employee works from the job title alone, which is valid but thin.
The button at the bottom isn't Next. It's Find My Perfect Employee, and it generates the full profile from what you just described. It takes a few seconds.
Step 4: Give them a face
Step two of the wizard is the portrait. The physical description is pre-filled from the generated profile and you can rewrite it. You can generate a portrait, upload a photo you already have, or skip it and use initials.
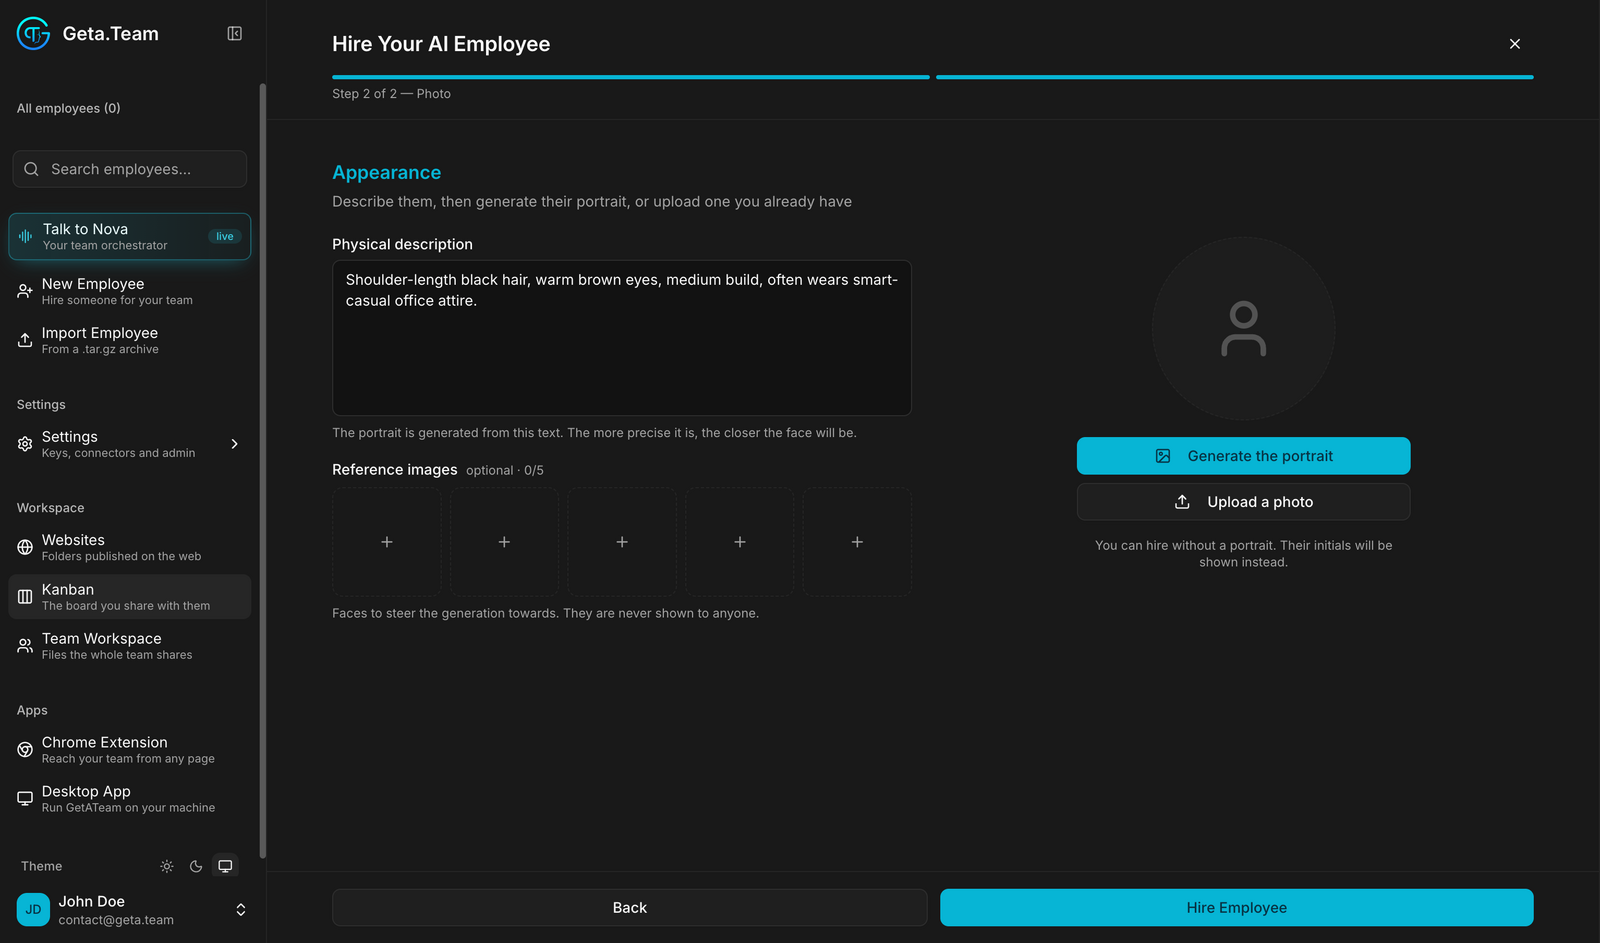
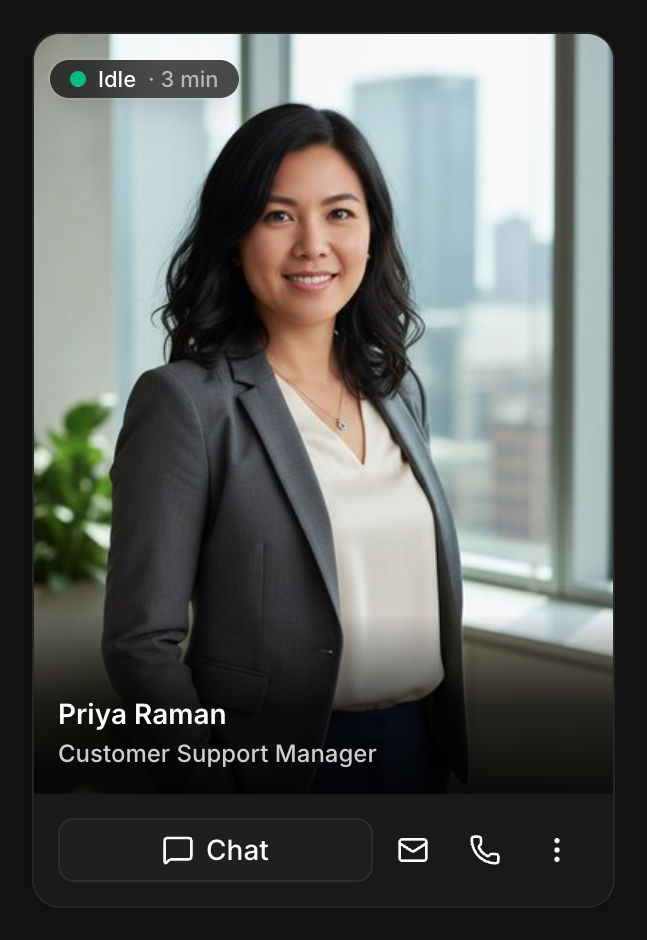
It sounds cosmetic. It isn't, entirely: your team will talk to this employee every day, and a name and a face make it much easier to think of it as a colleague you delegate to rather than a tool you poke at. Click Hire Employee and the card appears on your dashboard, with its own email address and phone line from day one.
Step 5: The first-morning briefing
Click Chat and introduce your business, once. Who your customers are, how you talk to them, what you never do. What you say here can be remembered, so this conversation is worth ten minutes.
For the rules that should hold on every single task, use Configure → Instructions. That's the employee's standing brief, read before every job. The documentation puts it well: write it as you would brief a new hire on their first morning. Not a list of prompts, a set of rules. Tone with clients, the refund limit, the things that always go to you.
Step 6: Decide who it's allowed to talk to
This is the step that surprises people. Open Configure → Email & contacts.
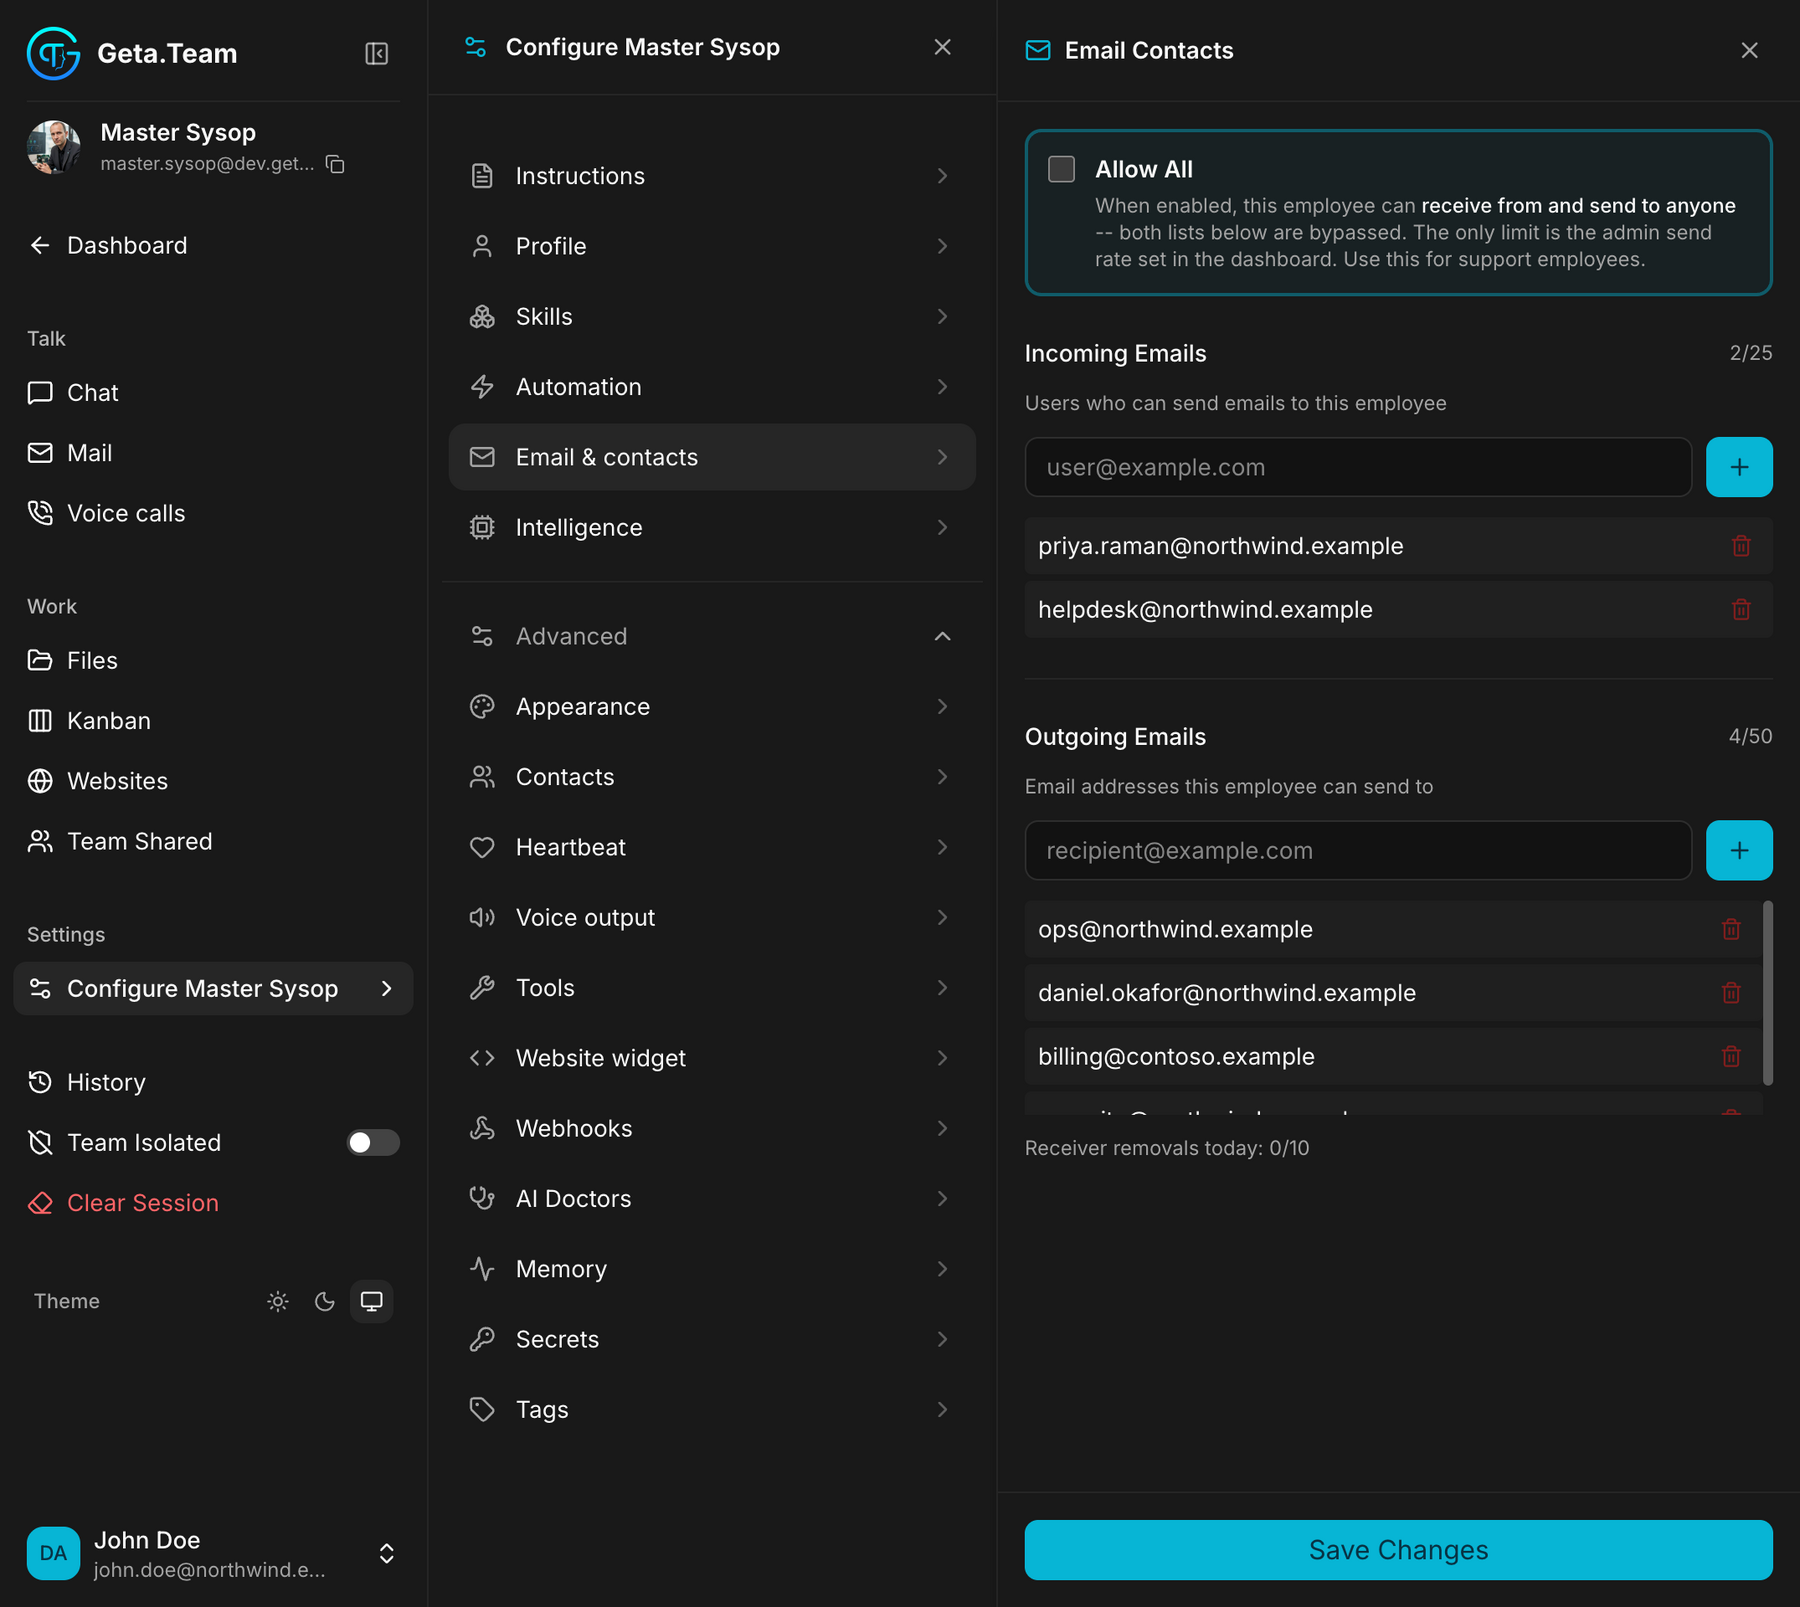
Both lists start empty, on purpose. A new employee won't read email from anyone who isn't on the incoming list, and won't write to anyone who isn't on the outgoing one. That's a security choice, not a quirk: the employee acts on what it reads, so whoever can email it can, to a degree, direct it.
In practice:
- Add yourself, your team, and the clients or suppliers it should hear from.
- If this is a support employee whose address will be public, switch on Allow All. That's what it's for.
- Outbound email is capped at 25 per day per employee by default, and replies don't count.
If someone tells you "I emailed it and got nothing back", check this screen first. Mail from senders who aren't on the list is dropped, and the employee never sees it.
Step 7: Hand over the tools, and only those
Out of the box your employee can hold a conversation. Skills are what let it do things: browse the web, run code, generate images, publish a page, query a database. Open Configure → Skills and add what the job needs.
The rule is the same as with a person: you wouldn't give the new receptionist the keys to the accounting system. Grant skills for the job you wrote in Step 1. If it needs something that doesn't exist yet, you can ask it to write that skill itself.
Step 8: Give it work that happens without you
This is the step that turns a chat window into an employee. Open Configure → Automation and add a task: a brief plus a schedule.
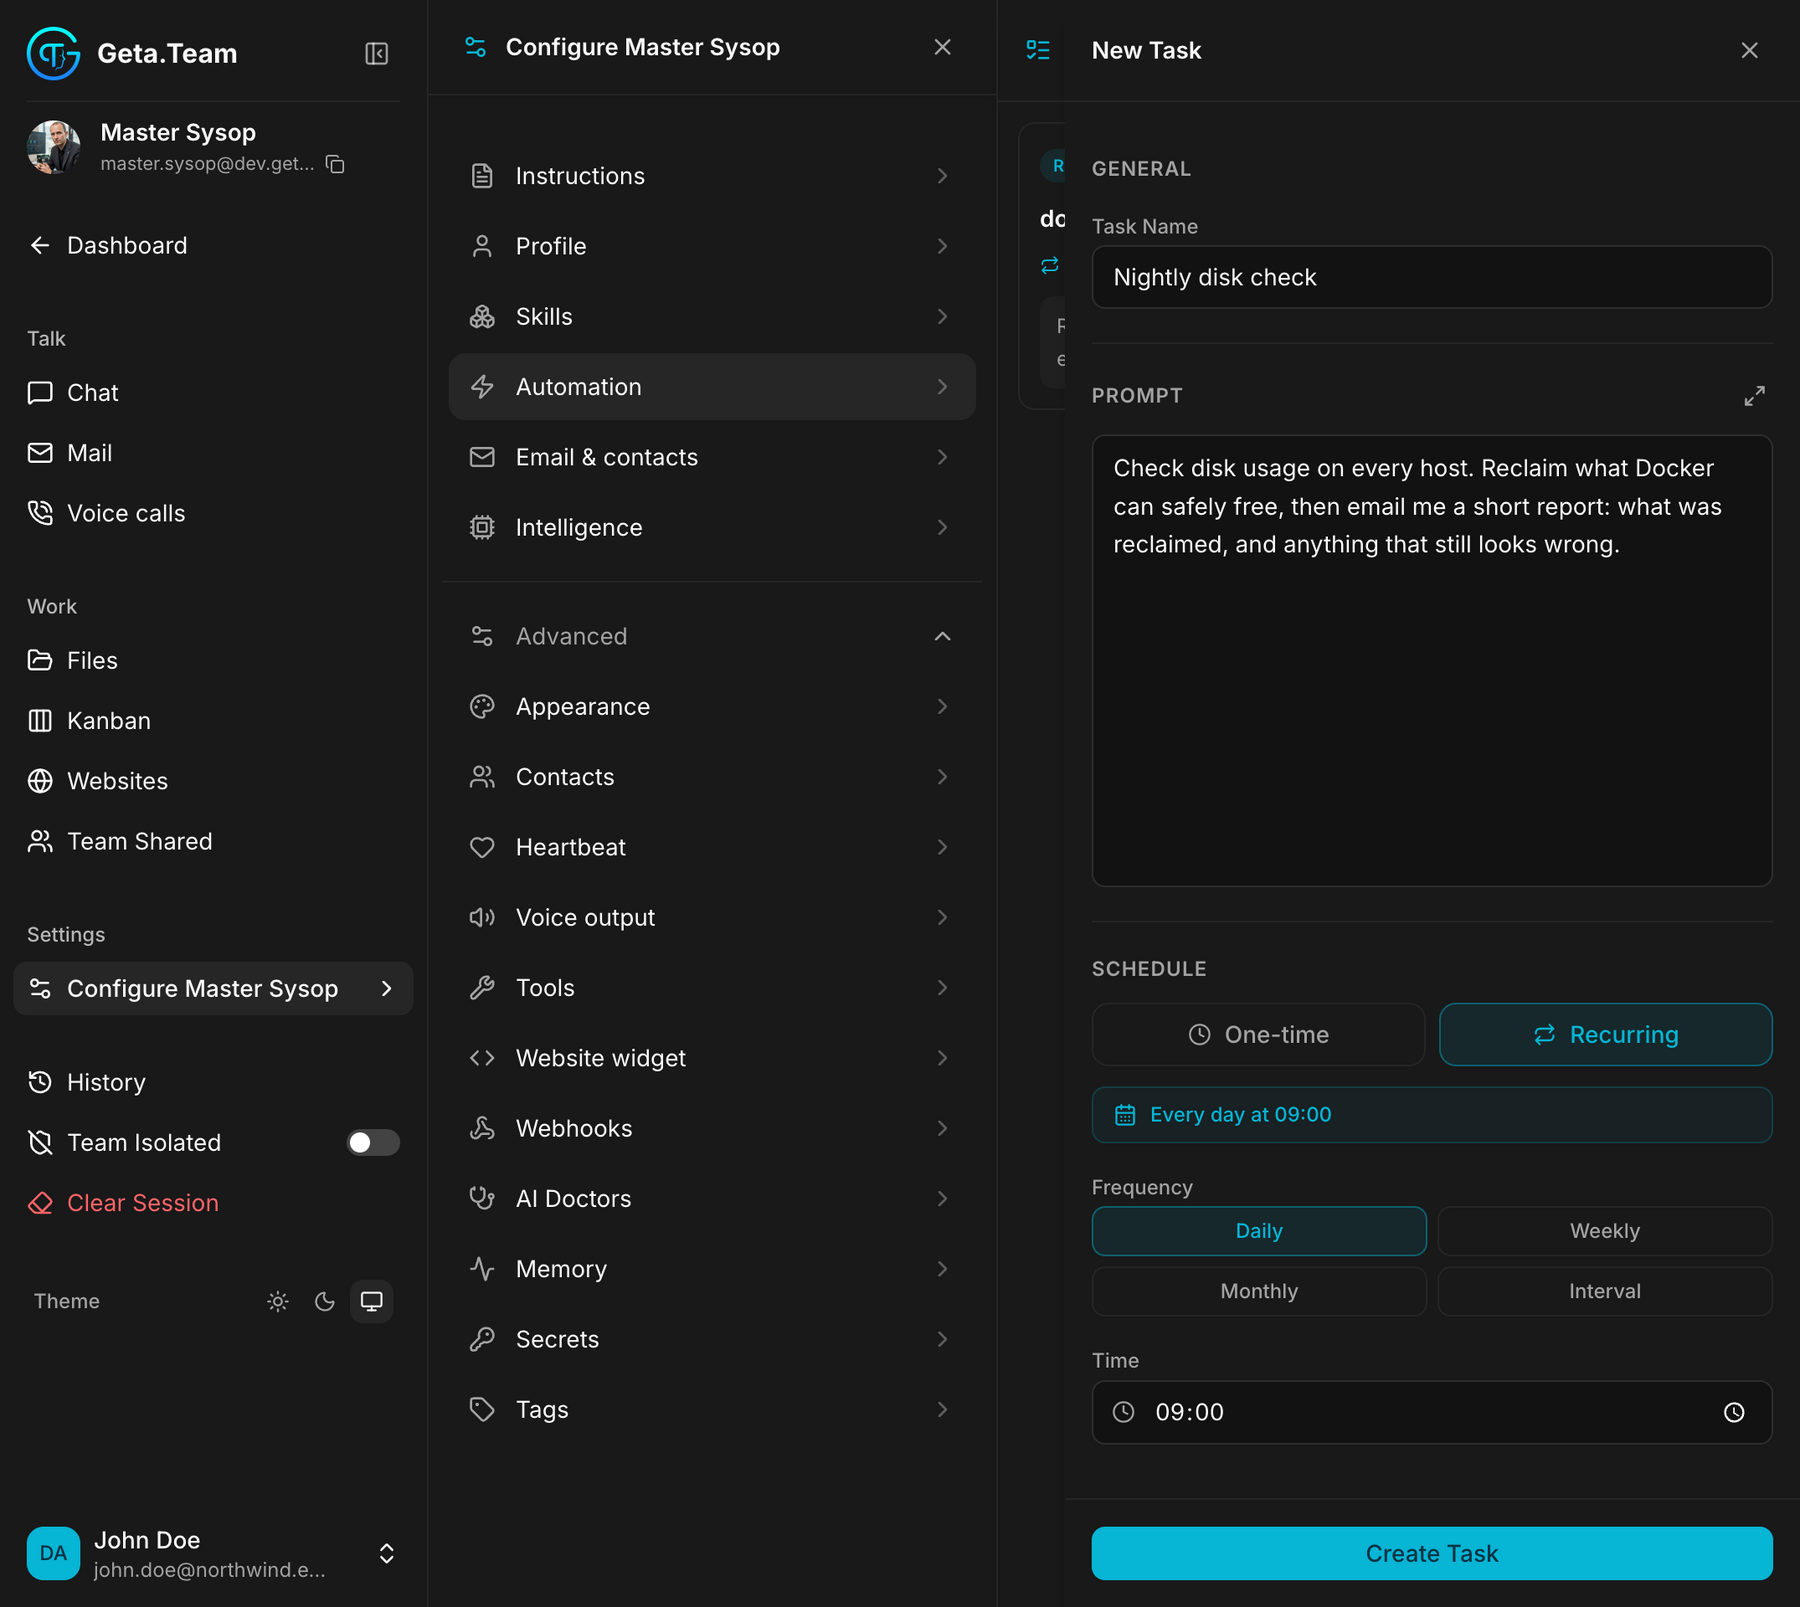
Every Monday at 9, summarise last week's support emails and send me the three that need my attention. Or just say it in the chat and the employee creates the task itself. Use Run now once to check it does what you meant before leaving it alone.
Two tips from the docs worth repeating. Write the brief in full, because it runs with nobody around to answer questions. And be careful with the Interval schedule: every five minutes means close to 300 runs a day, each one real work.
Step 9: The 30-day review
You'd review a person after a month. Do the same here.
- Cost. On the hosted plans, the credit gauge at the bottom of the employee's sidebar shows what's been used. If a high-volume, simple job is running on a high model tier, move it down (Mini or Standard) and keep the top tiers for the hard work.
- Memory. If it "forgets things", check Advanced → Memory. The memory reminder is off by default; a nudge every twenty or thirty prompts changes what survives the week.
- Scope. Look at what it escalated to you. If it's handing you things it could handle, widen the instructions. If it handled things it shouldn't have, tighten them.
- Next hire. If the first job is running smoothly, that's usually the moment to write the second job description.
The short version
Write the job, including what it shouldn't do. Pick a profile. Spend a minute on What they'll handle. Brief it like a new hire. Set who it can email. Grant only the skills it needs. Give it one recurring task. Review it after a month.
None of it is technical. It's the same hiring discipline you already know, applied to a colleague that doesn't sleep. The full walkthrough, with every screen, is in the Geta.Team documentation.
Want to test the most advanced AI employees? Try it here: https://Geta.Team